The LOGMAN Step-by-Step Guide to Building a Bass Guitar
Step 1: Purchase parts as per below
Step 2: Attach pickups to control plate, feeding pickup wires through bass body chamber.


Step 3: Attach pickups to bass body.
Step 4: Attach control plate and bridge to bass body.

Step 6: Realise you forgot to place the mounting pads under the pickups, which was why you were having such a hard time screwing in the pickups.
Step 6: Remove pickups, attach mounting pads and replace pickups.
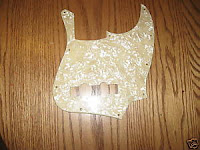
Step 7: Attach pickguard.
Step 8: Go to attach neck, but realise there are no screws to do so.

Step 9: Go to Mitre 10 to purchase screws that look the correct size but are too big.
Step 10: Laugh. A lot. Go watch Roddy Piper and Hulk Hogan set a steel cage match for Halloween Havoc.
Step 11: After a week of ignoring the bass, install tuners to head of neck.

Step 12: After another week of ignoring the bass, finally order screws for the neck.

Step 13: Screws arrive a week later. Look for power drill that has somehow disappeared into a black hole so attempt to drill holes with someone's cheap and powerless drill. Fail.
Step 14: Borrow power drill, drill holes and attach neck.
Step 15: Install strings. Cut the G too short and have it somehow disintegrate during the tuning process, leaving it completely unusable and impossible to successfully set intonation and tuning.
Step 16: Order another set of bass strings from the US
Step 17: Install strings.
Step 18: Go to adjust action. Discover you do not have an allen key small enough to make adjustments on the bridge.
Step 19: Go to Mitre 10 and Bunnings to buy another set of allen keys - one that contains a super small allen key to adjust the bridge on the bass. They are lame, so you will fail.
Step 21: Make necessary adjustments to the truss rod and bridge, adjusting string height and intonation.
Step 22: Discover one pick-up is shorting out, so re-cut and solder neck pickup wire.
Step 23: Re-attach ground wire properly and screw control plate back on.


Step 25: Don't worry that it could have been done in a matter of days instead of a month.Freak out because you no longer have any excuses to keep delaying your recording. SNAP!


1 comment:
I am well impressed!
Also with your MD - he went and got you guitar parts whilst on a trip?? That's a high-five-worthy act of kindness and coolness.
Post a Comment